There are many factors one has to consider while making a YouTube video. However, that does not necessarily mean that it is an impossible task to do. Although there is no sure-fire way of one’s YouTube channel reaching that desired “Trending Page”, one should remember that is not the end goal. If you want to be successful at making a YouTube video, there is just one thing to remember. View it as a fun learning experience and just start planning and recording.

The actual goal of creating a YouTube involves capturing what you have to say. All the steps and efforts that you have to follow and make will be geared towards this. Think of this as an exercise in self-expression. So without further ado, it is time to get into the nitty-gritty of YouTube videos and how to make them.
Getting Started
The beginning of your YouTube career can be slow to start, albeit eventful. To begin, there is a significant amount of planning that has to happen before hitting the record button. Here’s a step-by-step process of making a YouTube video.
Step Number 1: Formulating a YouTube Strategy
The beginning of your YouTube career can be slow to start, albeit eventful. To begin, there is a significant amount of planning that has to happen before hitting the record button. The rundown of requirements is as follows:
To better understand what this entails, it is essential to understand the definition of a YouTube strategy. A YouTube Strategy refers to a course of action that one will follow while making a YouTube Video. This strategy will help one to conduct proper research for a specific audience while also creating a cohesive script.
The next step is to understand the different aspects of a YouTube Strategy. The components involved in a YouTube Strategy are:
- Audience
Let’s begin with the Audience aspect of the strategy. The audience is one of the most important aspects of a YouTube channel. It is what makes an individual make YouTube videos, a YouTuber. Therefore, when starting, you have to determine which audience you are targeting and which audience will enjoy your content more.
To see the most success from your YouTube channel, it is essential to pick one kind of audience, in other words, a niche audience. For example, the YouTube channel Technology Connections makes videos regarding the working of several electrical appliances. The content on his channel caters to the audience that finds interest in Electrical Engineering and Physics. Over the years, the creator has amassed over 1 million followers.
The common mistake that YouTubers make on the platform is the fact that there is no clear vision of who they are creating for. To overcome this confusion, let us consider the following questions:
- What kind of subject am I addressing through my videos?
- Which community of people would be interested in this content?
- What am I capable of offering to this community through my videos?
- What other content would they like to see?
The above questions should make the process of choosing an audience easy.
Pro-tip: The more specific the audience, the easier it is to cater to them.
- Content
Once one takes care of this aspect, one can move onto the content aspect of the strategy. This component relies heavily on the wants of the subscriber if you really want to grow your channel. Therefore, it is essential to find topics that could pique the interest of viewers. You can start creating topics.
For this reason, when you are starting out, it would be safer to create content addressing niche topics. This way, neither you nor the incoming viewers get confused about the purpose of the channel.
While creating content, research should hold the utmost importance. There are a variety of research methods one can adopt. However, it is different for every person. Therefore, ensure that the content you are adding to the video is not on the basis of assumptions (if it is factual information).
The only time the content does not have to receive a backup by facts is when you are expressing your opinion. However, it would add a lot of value to the opinion if you do indeed possess facts to support your claims. Niche content can also hold significant value while optimizing one’s videos, as we will see in the next step.
To conclude this step, here are some important points while creating a YouTube Strategy:
- Niche content for a specific audience is better when starting out
- Content included in the video should be well-researched
- The topics included in the video must be as per the liking of the targeted audience
- Ensure that the video has substantial information and has either educational or entertainment value (preferably both)
Step Number 2: Search Engine Optimization
An ideal YouTube Video should bring in numerous viewers and subsequently numerous subscribers. Optimizing a video has a lot to do with the topic one chooses to make. Therefore, one has to carry out good SEO practices while deciding the topic of the video and also before posting it. But how does one find a topic that could not only cater to the audience but also favor the search engine? The answer involves the following steps:
- Keyword Search
This method involves searching up a particular topic on the search tab of YouTube. For example, if you are predominantly a history channel looking to make a new video, you can search for words like “Aftermath of WW2”. This is a keyword.
Upon hitting the search button, you will find an array of videos related to it. Firstly, one has to determine how many videos have been created on the topic. The more videos that pertain to this topic, the more competition there is to beat. Therefore, it is not an ideal topic to go with. This method requires finding a niche topic with less competition. This makes it easier for the search engine to find and promote your video.
The aim of the game is to stand out, not blend in.
- Description Boxes
This step will occur later after the video is recorded and edited. The description box will contain a summary of the topics or occurrences in the video. One can also add links to their social media accounts. From the SEO point of view, the description box should also be the place where keywords can be added. This will make it easier for the search engine to index the video and then promote it to an audience.
- Tags
A YouTube tag is a keyword that one has to add to a video in order for people to find it easily. It is an important requirement as it helps the algorithm to understand what the video is about. It then recommends it to viewers looking for that kind of content. You can add these tags just before posting a video in the “Tags” box.
Tags should be present on the basis of their relation to the keyword. Therefore, add more specific tags first and then add tags pertaining to broader topics later.
Side Note:
As seen in the case of description boxes, titles can also play an important role in optimizing the video. Experts state that the YouTube algorithm prefers titles that contain two things. The first requirement is specificity. Titles should clearly state the objective or what the video contains. The second preference questions. The titles that possess questions are much more likely to see more views. This is especially true for instructional videos.
The crucial points to be kept in mind while optimizing the video are:
- Use a specific keyword
- Keyword should be specific and have less competition
- Add a keyword and related keywords to the description box
- Add tags to every video
Step Number 3: Investing in Equipment to Make a YouTube Video
This is probably a more expensive aspect of creating videos. Step 3 involves determining which is the most suitable equipment to film videos. The following requirements will have to be present:
- Audio
Audio can make or break the viewing experience. Therefore, it is of utmost importance to find the right microphone. It should also be your first investment. Microphones can be a costly commodity but are still essential, depending on the location where you will be filming and the kind of video that you are making.
At present, most creators agree that the Rode microphone series is always a great investment, albeit costly. In case you are looking for something less expensive but offering amazing quality, the Blue Yeti microphones are available. For more in-depth research and a rundown of all the features, visit this article.
- Video Recorder
This can be a DSLR or a Phone. Given the advancement in the quality of videos shot on phone cameras, one can opt to film using a phone only. However, if you wish to deliver quality content with high resolution, then handheld DSLRs are the way to go.
The ideal DSLR should contain the following features:
- It should be portable to provide one with the option of filming anywhere
- It should not be overly expensive but also have all the features that can make a good quality video.
- The camera should provide you with an option to easily port the video from the camera to the computer for editing and posting.
To know more about the cameras that would best suit your YouTube videos, check out this article.
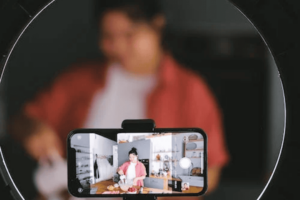
Lighting can greatly contribute to the quality of a YouTube video. You want to be seen in the best light possible, pun intended. Therefore, a creator can choose between natural sources like sunlight or artificial sources. This can especially benefit a creator that is using their phone to record as it provides the illusion of quality.
Here is a short comparison and instructional segment to help you decide between the two options:
Sunlight can be a cheap lighting option. However, it cannot be under one’s control. For example, shooting in direct sunlight can be extremely challenging as it is difficult to control how bright it is. The window to record is tiny as one has to avoid too bright or too dark times of the day.
The artificial method of lighting comes with several benefits that make the investment worth it. However, there are several tips that one has to remember while using these lights as well. One important detail while using lights is that it should not be too harsh. You can use a diffuser or place it at a distance from the item in the frame. In case you are recording in a room, you can turn the lights to the walls. This will allow the light to bounce off the walls.
Concluding points to adhere to:
- Audio and lighting should have top priority
- It is possible to create top-quality videos with even a phone camera, provided it possesses HD resolution filming.
- Invest in artificial lighting for a better quality of the video.
Step Number 4: Recording the Video
This step is probably the most nerve-wracking process in comparison to other steps. It also requires the most patience. There are several requirements before one is able to hit that “record” button.
The most important requirement is the script while making a YouTube video. A script of a YouTube video involves mapping out not only the dialogue made in the video but all the location changes. It can act as an overview of what the video will look like. To better understand the principles of a good script, let us first delve into the different components of a YouTube video.
- Intro
The script, in this case, will have to carry out two functions. The first requirement is for it to accurately put forward a summary of the message or content that you want to say. Another requirement is adding calls to action. That is, asking your viewers to like, comment, and subscribe. The main aim of this segment should be to grip the viewer.
You can make a compelling intro using the following methods:
- Adding a segment from the body of the video to draw the viewer
- Throwing in some random interesting facts that add shock value or interest the viewer
- Adding in an animated introductory segment in case that is the style of the video
- Body
This is the “meat” of the video. The part that has the most value to the viewer. It is important to make this part have as much value as possible. Now that you have the attention of the viewer, the priority should be to keep this attention. Therefore, one can add the following:
- Do not delve into a single topic for too long.
- Treat your audience with respect. Refrain from over-explaining any topic.
- Stray away from oversimplification as much as possible.
- Make sure to add relevant images, videos, or animated graphics in this region.
Advertisements:
In case you do get a sponsor, make sure to promote the sponsor in between the video. This should happen without losing the attention of the viewer for the rest of the video. A great way to do this is through a Segway. A Segway involves transitioning from the video’s subject into the advertisement. Not only does the audience not realize that the advertisement has begun, but they also tend to appreciate it (Or skim forward, as seen in many cases).
- Outro
The outro is the last portion of the video. This will include three parts:
- Conclusion to the video
- Call to action (only if it is not present in the beginning)
- Promoting fan art or the next video.
The conclusion should be a summary encompassing the entire video and the topics mentioned. For example, if you are a science channel, it would summarize the concepts that were spoken about in the video.
The outro can also be a way of addressing the audience directly. You can use this time to mention giveaways, upcoming projects, or anything else that would potentially make the viewer come back to the channel.
For further reading, refer to the following article here.
Location
One can either choose a location inside a closed space like an office or the great outdoors. However, with the unpredictability of the weather and lack of privacy, creators prefer indoor locations.
Pro-tip: Remember to record a few extra portions before the intro and after the outro. This footage can be removed in the editing process later. In addition to this, remember that longer videos that are between 12-15 minutes are more likely to succeed.
Points to keep in mind while recording:
- Create an outline of the script dividing the video into three segments.
- Remember to make the script knowledgeable as well as compelling
- Choose a location that adds value to the content
- Keep the camera at eye level for “sit-down” videos
- Try to get many angles while filming.
Step Number 5: Editing the Video
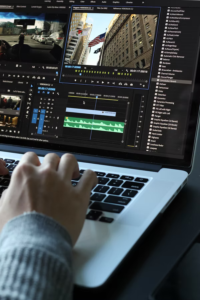
The penultimate step before reaching the public is the editing process. This is where the real magic happens. The editing process can be time-intensive and monotonous but necessary nonetheless. While editing a video, one should look to add in the following components:
- Cuts and transitions
- Graphics at the bottom of the video
- Music and other audio effects
The way you edit can greatly contribute to the “character” of the video. That is, the editing process allows one to not only correct mistakes but also add personality and uniqueness to the video.
The steps involved in the editing process and software that aid in this process can be found here.
Concluding points to remember while editing:
- Trim the “extra” portion added to the beginning and end of the video.
- Add effects and transitions
- Ensure that the audio is of good quality.
Step Number 6: Posting the Video
Now, for the final step; posting the video on your YouTube channel. Download the YouTube Studio app from any app store to have better control over the channel. In order to post a video on YouTube, one has to follow the steps below:
- Find the “create” button in the top right corner of the YouTube homepage.
- You can choose between going live and uploading a video.
- Click on “upload video” and find the video which has to be posted.
- Create a thumbnail.
- Add the description at the end of the video
- Put in appropriate tags (as many as you can add)
- Add closed captions or subtitles to provide a better viewing experience.
- Click on post
The Perfect Thumbnail
The thumbnail is as important as the title, if not more so. A thumbnail should contain the following requirements according to this article:
- Vibrant color composition to attract viewers
- Pertains to the content in the video
- It should be in JPG, PNG, or GIF format
- Resolution should be 1280×720 with a minimum width of 640 pixels
- The aspect ratio has to be 16:9
- File size cannot exceed 2 MB
The YouTube Studio app creates a range of automatically generated thumbnails to choose from. However, you can always optimize thumbnails and make your own, adhering to the requirements above.
Points to remember while posting:
- Add as many tags as you can
- List out possible keywords in the description
- Thumbnail should be brightly colored and noticeable
Step Number 7: Analysis and YouTube trends
Although the video is public, the job is not done yet. One has to ensure that they are doing all they can to contribute to the long-term growth of the channel.
The following analytics need to be checked regularly:
- Demographic watching your content
- Subscriber count
- Watch time
- Views
- Revenue coming in
These are the primary analytics that is displayed when you visit your channel in the YouTube Studio. One can even compare the performance of the channel or choose a stipulated period to analyze the data. By analyzing this, you can learn if the content you are putting out is well-received or not. Depending on that, optimize your content.
Your channel is now up and running and showcasing your work. It should be a proud moment or a personal achievement worthy of praise. Remember to let your uniqueness shine out through the videos, as the audience will prefer that more than anything. After all, creating these videos should be a source of joy to you and your subscribers.


