An eye light is the source of light that reflects off an eye’s surface. This light adds dimension and depth, bringing out the emotion of the subject.
Why Use An Eye Light?
Eyes seem unemotional and lifeless on film without an eye light. We look to the eyes of a person to gain insight into their emotions, which gives their words and actions context. The eye light is the key to illuminating emotions allowing us to better connect with characters. 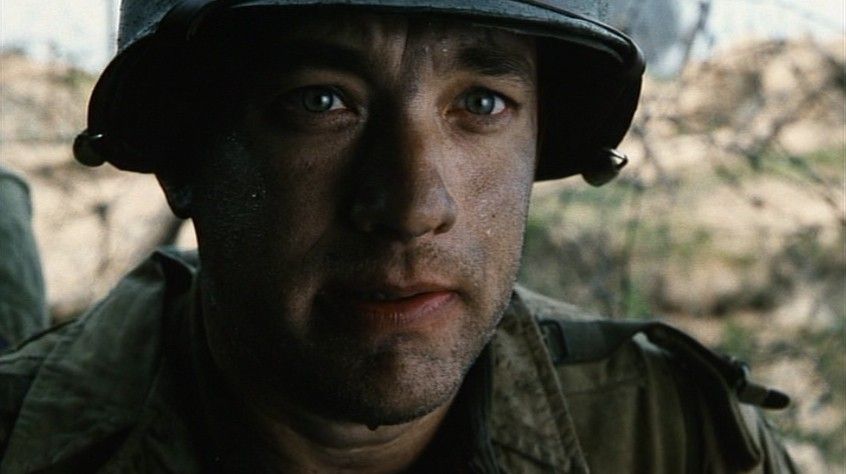 Scene from “Saving Private Ryan” Without eyelights, actors eyes can appear empty. You can also choose to create this effect if that’s what your story requires. For instance, in the movie “The Godfather,” the eyes stay dark. Viewers constantly have to question the characters’ intentions. Without that eye sparkle, characters feel mysterious and distant. “The Godfather” uses a high-angle lighting design that keeps Marlon Brando’s eyes always shaded.
 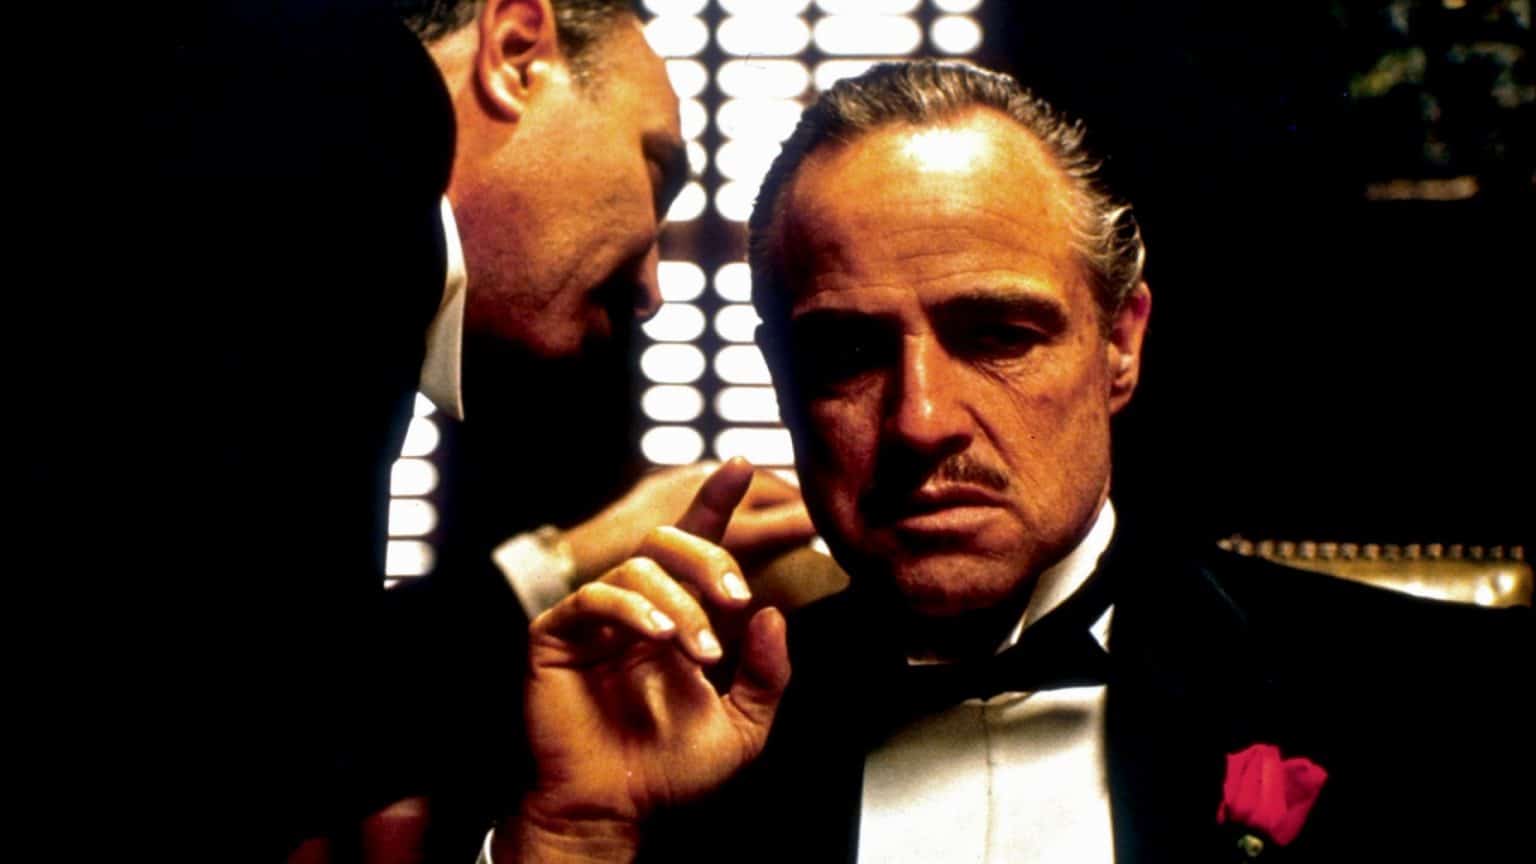 Scene from “The Godfather”
Why Not Just Use Three-Point Lighting?
The basic three-point lighting setup is great when you start to plan your lighting. However, this setup can lead to the brow shrouding the eyes, taking away any hint of light getting reflected back to the camera from the eyes. If you’re going for a dramatic setup, you’ll have very little fill light or none at all. Angling the key light to the side takes away any reflection from the eyes, making them look lifeless and dull. Enter the eye light, which solves the problem while maintaining the dramatic effect you’ve created. If you put a low-powered small light next to your camera, you create a sparkle of light that reflects back, bringing the eyes to life. Tools like eye filter attachments from light manufacturer Dedolight can help you create the ideal shot. The small flickers of light you see end up being hugely important to a scene, so you should keep them in mind when considering lighting schemes for sets. Don’t confuse an eye light with a “slash” of light across the actor’s eyes. This is a dated technique that filmmakers used to use to accentuate heightened emotion. You can find an example of a parody of this old style by Owen Roizman in the 1991 film “The Addams Family” when Anjelica Huston (as Morticia Addams) steps right into a slash of light that goes across her eyes.
History of the Eye Light
You’ll see eye lights in images from magazine photographs or on film. You can even see examples of eye lights used in music videos like Madonna’s “Vogue,” which was photographed by Pascal Lebègue and used a traditional ring light. Legend holds that the eye light started in with “The Lodger,” a 1944 film shot by Lucien Ballard. The film starred Merle Oberon who had small scars on her face as a result of a car accident. Ballard washed out the scars with a small lamp that he positioned right over the camera. The light also highligted Oberon’s eyes, giving birth to the eye light. Obtaining the perfect eye light is often harder than simply putting a light near a lens, though. Another great example of the use of eye light is the film ” I Origins” from cinematographer Markus Förderer. 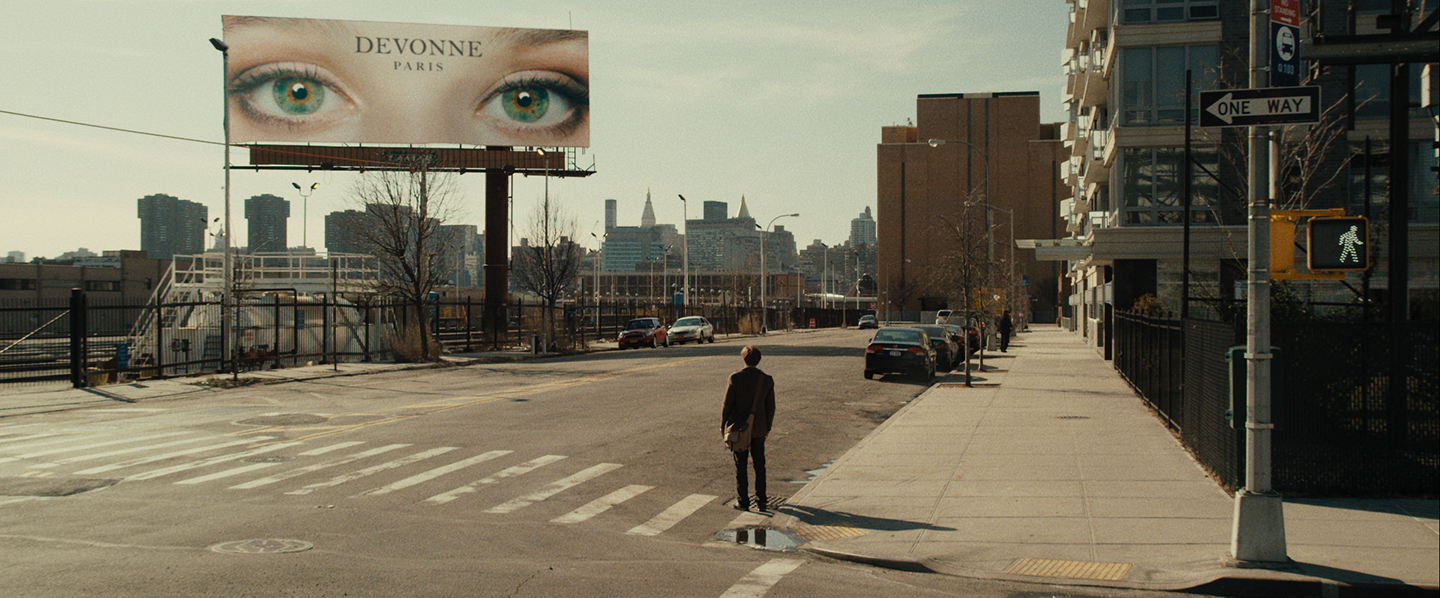 Scene from “I Origins”
Placement of the Eye Light
You’ll typically place an eye light on, or just slightly above, the position of the camera. You should consider the scene you’re shooting as well as the angle of your key light when deciding what to do. The eye light doesn’t need to be in an exact line with the key light, but it should come from generally the same direction. You can move the eye light to the side a bit more toward the key light if you’re using dramatic low-key lighting. This action extends the key light into the eyes of the subject, adding a sparkle that the key light can’t create itself. If you’re lighting your subject with a light from a high angle, you should move the eye light higher up so that you raise the eye sparkle above the eye’s pupil. You can experiment to create the most dramatic and realistic placements for your style. Learn more with this Lynda tutorial: The Important of Eye Light.
What Is a Catchlight?
It’s just another word for “eye light!” A catchlight adds dimension to the subject’s eye and the entire subject by extension. Catchlights and eye lights can come in any shape or size. It’s up to the photographer to decide how to capture the light. Photographers often use reflectors to bounce light into a subject’s eyes. Round, large reflectors create bigger catchlights. On the other hand, a small electronic flash creates a small catchlight. Tips for catchlight photography include:
- Place the eye light near the lens to ensure you can capture the reflected catchlight.
- Remember that the shape of the reflector or eye light will alter the catchlight shape as well.
- Try using a ring light attached to your camera lens; this is a common method of creating catchlight.
This video highlights different types of catchlights and how they work:
How to Capture Catchlight
Sure, catchlight appears accidentally from the lights you’re already using. Instead of leaving it up to chance, though, you should think about why you need a certain reflection.
There are certain key steps to take to create the perfect eye light.
1. Aim the Source of Light Into Your Subject’s Eyes
You don’t want your subject to stare directly into a light, but make sure they’re facing the light, whether they’re inside or outside. If you’re filming indoors, ask the subject to stand facing a window. A 45-degree angle is best. The rest is shadows that look natural along with striking catchlights. If you’re filming outdoors, look for a shady area to produce catchlights. Having an actor stand under a tree or awning while facing the light will create eye lights that appear natural.
2. Design the Look of Your Eye Lights
How you decide the look of your catchlight will depend on your intended effect. Your look will be different depending on the type and tone of your scene. For example, a catchlight for a romantic scene will be different than one for a suspensful scene.
3. Use the Right Light Source
The size and shape of the lights you use will directly affect the size and shape of the light reflecting off the subject’s eyes. Use a reflector or independent light to full control the color, direction, and intensity of the catchlight. A reflector allows light to bounce into the eyes of your subject. It’s a necessary piece of equipment beyond being a light itself. Consider the type of reflector you need to use. A large reflector produces a large catchlight while a small reflector produces a smaller reflection. Generally, smaller works better for most intended effects. You also need to choose the color of your reflector. Silver reflectors are generally the best ones to use. However, you can use gold reflectors if you want to create warmer tones.
4. Experiment With the Position of Your Catchlight
You can experiment with various angles to find the perfect position for your eye light. One traditional method is thinking about eyes as if they are a clock and putting the light at the 10 o’clock or the 2 o’clock position. The most important thing is to make sure you don’t create something that looks unnatural. Usually, unnatural looks come when you go below the 9 o’clock and 3 o’clock positions. Still, you should experiment to find what works best for your particular story.
Adding Catchlights in Photoshop
You can use editing programs like Lightroom and Photoshop to take out extra catchlights that appear in one eye. You should strive to keep the one catchlight that appears most natural.
Post-production software may help you enhance your eye light after capturing it. However, you should generally use software only if you couldn’t create that same effect at the moment. You can learn more about film and how you can improve your skills by applying to the Nashville Film Institute here.


