International Organization for Standardization, abbreviated as ISO, is one of the three standards in photography. It is a setting that lightens or darkens your photo. The lower the ISO number, the less sensitive the camera is to light.
Combined with aperture and shutter speed, ISO forms the exposure triangle in photography and is fundamental to your images’ quality. Because of this, ISO may help you take better photos in low-light situations and give you greater control over your aperture and shutter speed choices. When users can’t brighten an image using shutter speed or aperture, increasing the ISO is advisable.
How Is The ISO Standard Determined?
Every camera has a range of ISO values. The lowest figure is known as the basic ISO for that camera which is usually around 100. After that, the ISO scale goes up by a factor of two, going from 100 to 1600, e.g., 100, 200,400, and so on. Based on your camera model, ISO can have a base as low as 50 and have extra values such as 150 and 300 or 140 and 280.

Low ISO Setting
Low ISO values such as 300 and below are often associated with better quality photos when taken with a digital camera. This is because low ISO settings require more light, or low ISO is used in brighter environments. When there’s more light sent into your camera, naturally, you use a slow shutter speed. Low ISOs such as 100, and 200 are used mainly in brighter conditions (like sunlight) or when your camera is on a tripod. In addition, lower ISO levels are ideal for landscape photography.


On the other hand, suppose you don’t prefer too much light or want a fast shutter speed. In that case, you raise the ISO levels. However, increasing the ISO leads to a comparable drop in quality, so pictures with a high ISO might have an undesirable gritty look.
High ISO Setting
Cameras capable of producing high-quality photos at high ISOs are referred to as having increased ISO capabilities. To increase the brightness of a picture, you may increase the ISO setting. This is because its pixels must collect as much light as possible to get the finest possible picture quality from a sensor. E.g., ISO 12,800 is comparatively much brighter than ISO 400 and ISO 200—increasing the ISO to the highest-level setting results in noise which spoils the image quality.
What Is Noise?
In photography, noise is a grainy veil covering up details and making the image seem worse. If a picture is too noisy, it is worthless. When scaling a picture gradually from black to grey to white, there is no noticeable difference. Instead, it grows more distorted and pixelated. That’s what is called “noise.” There will always be some noise in a photograph, no matter how good the photographer is.

Types Of Noise
Photographs include two sorts of noise:
- Shot noise
- Digital noise.
It’s difficult to distinguish between shot and digital noise when looking at the finished image. Both produce pixels that are erratically bright, dark, or discolored.
Short Noise
A photon noise, or shot noise, is randomness caused by photons in the scene that are discrete and unpredictable.
Noise Generated By A Digital Device
In photography, digital noise or electronic noise refers to the unpredictability introduced into a picture by your camera’s sensor and internal circuitry.
Auto ISO
You can use an Auto ISO while using a flash or an external Speedlight on your camera. Therefore, setting a minimum shutter speed is unnecessary if you are taking photos with a flash.
However, the D-SLR combined with Speedlight enables slow sync flash. In addition, the camera utilizes the minimum shutter speed selected in the Auto ISO menu, preventing the camera from picking a slow shutter speed. This is done to obtain proper exposure.
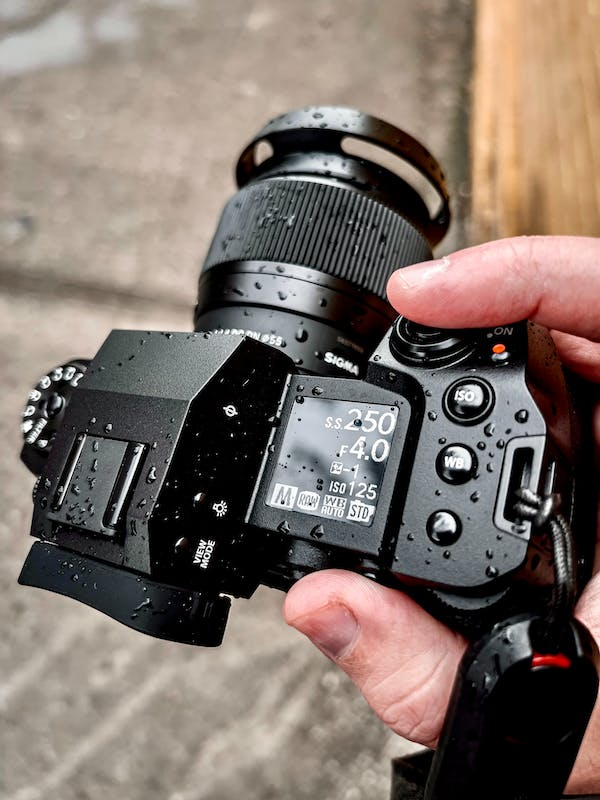
Changing the ISO Settings Manually
- To begin, choose an ISO setting that you have control over. Stop using Auto mode and use Manual, Shutter Priority, Aperture Priority, or Program mode instead.
- Enter the quick menu and locate the ISO area on entry-level DSLRs and mirrorless cameras. If not, leave it to Auto.
- A separate “ISO” button will be available on expensive cameras. You may change the ISO by pressing it while moving one of the wheels. Specialized ISO wheel settings are pre-labeled for identification.
- Refer to the camera’s instruction manual since ISO settings are often changed in low-light situations.
When To Use High ISO Setting?
- An indoor sporting event, particularly when the subject is moving quickly.
- When using a tripod, a fast shutter speed is used for landscape photography at night to freeze the stars in motion.
- For portraits taken in a dimly lit setting or at night.
- Early morning or late evening fast-paced subjects require an ultra-fast shutter speed for indoor events with little window light.
When To Use Low ISO Setting?
- Photographing still scenery while using a tripod to take portraits.
- When there’s adequate light coming in through the windows during an event or employing flash items with a strong artificial lighting setup.
- Photographing subjects using a solid artificial lighting setup.
Know When To Use Each ISO Settings
To explain ISO’s role in exposure, photographers have typically referred to it as the backfield of the exposure triangle. Changing the ISO while photographing at various times of day is necessary. In contrast, if you boost the ISO, you’ll likely end up with a lot of digital noise. However, times have changed. Higher ISO settings are now possible with many newer cameras, allowing you greater creative control over the quality of your photos. Cameras nowadays are capable of capturing images with an ISO of 25,600 or more.
ISO – 200
Keeping your ISO at 100 to reduce the amount of noise in your images is good. Still, in the current condition of photography, this was a wise decision. Most cameras, however, have essentially no apparent difference in terms of a picture taken at ISO 200 or ISO 100. Therefore, use ISO 200 by default to get an additional stop of light. Improved images will be the consequence of this.
- A fast shutter speed means better-looking images.
- The narrower the aperture, the more depth of field you will be able to capture.
ISO – 400
Increase the ISO to 400 when shooting outside. Consider switching to ISO 400 when the sun is getting near the horizon or about to go beyond the skyline. There is minimal digital noise in most cameras at ISO 400 while photographing outdoors.
- The quality of the image doesn’t change.
ISO 800- ISO 1200
If the picture doesn’t get cracked up or a more detailed picture needs to be obtained, turn on the setting to ISO 800.
- When increasing ISO, you may get a bad image because of the noise.
- When choosing a slow shutter speed, then it is compelled to use a higher ISO.
ISO 1, 600
Adjust ISO to 1600 if the light is decent enough while moving inside. If the lighting is terrible, raise it further higher.
- Feasible to keep the ISO lower if you use a tripod and no moving subject.
ISO 6, 400 – ISO 12, 800
You can opt for this when there is very little light available or less movement of the subject. A high-speed, wide-open f/2.8 lens and a minimum shutter speed of 1/400th of a second is recommended in such conditions. This process is implied to ISO 12800 too.
- Little noise has to be reduced when going for this option.
- These options are used very rarely.
How To Take The Perfect Shot In Low Light With Higher ISO?
Shooting in low light without a flash may be complex and produces extremely dark, blurry, or grainy images. However, you can avoid these problems with practice by using the camera’s flash in low-light circumstances and still obtaining great photos.
Setting up ISO
Allowing more light into the sensor using ISO 400 or 800 will result in better results than ISO 100 or 200. However, the sharper the picture, the lower the ISO, and the noisier the image in low light. So, consider using higher ISO levels. Using an ISO of 800 is a good starting point for low-light photography.
Select Shutter Speeds That Are Significantly Slower
With prolonged exposure, more light may enter. Hence, you must keep your camera motionless to acquire a clear picture in low light with a slow shutter speed and no flash. Movement of any kind will cause fuzzy images.
Modifying the Aperture
A tiny f-stop value may help you take good low-light photos without using a flash. This is because ISO regulates how fast light reaches the camera’s sensor. A wide aperture, on the other hand, influences how much light the image sensor lets in.
Eliminate Camera Motion
When taking a clear picture with a slow shutter speed, you may experience a camera shake. In such a situation, using a tripod is recommended.
Using the built-in stabilization functions of the camera may also help reduce camera shake. However, the image stabilization capabilities of the camera are determined by the camera’s brand that is used.
Use External Light Source When Needed
Utilize as much natural light as possible to avoid the need for a flash. Shift the light source nearer the source if your subject isn’t stationary.
Opt for a Faster Lens
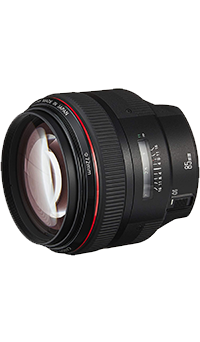
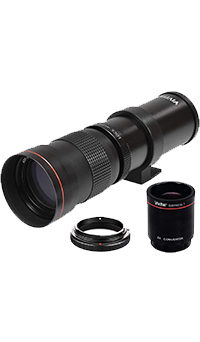
A fast lens is required to get the best results with a DSLR camera and an interest in low-light photography. A wide aperture (f/1.4, f/1.8, or f/2.8) is the signature of a fast lens, making it ideal for low-light photography since it allows the camera to capture more light. In addition, less camera shaking occurs because a higher shutter speed is possible with a larger aperture, resulting in crisper photographs. To buy a lens, click the links below:
Adjust The Color Calibration Setting
Low-light photography may result in photos that seem washed out or lacking in color and depth. Customizing the white balance on your digital camera tells the camera how white the picture is and the necessary adjustments to precisely capture the colors. Adjusting the white balance might help to avoid photographs that seem yellow, orange, or blue.
RAW Photographs
When photographing in RAW, better quality and crisper photographs are obtained in JPEG format. In addition, if you shoot in RAW, it provides a broader range of post-processing possibilities.
The Effect of ISO on Camera Megapixels and Sensor Size
It is closely connected to the sensor size and the number of pixels on the sensor to how often noise may be generated while shooting at high ISOs.
Pixels are the microscopic light-gathering receptors that make up a sensor. It takes one million pixels to make up a megapixel (MP). Therefore, it is possible to have a 12MP sensor with bigger pixels than a 24MP sensor of the same size, even if the two sensors are the same physical size. To get from 12MP to 24MP without diminishing the pixel size, you’ll need to expand the sensor’s physical dimensions. The pixel pitch is a unit of measurement for the pixel size in proportion to the sensor size.
Reduce Noise To Increase The Quality
- In small cameras, noise is seen at lower ISOs than with a DSLR with a bigger sensor when the ISO is raised. When shooting at ISO 800, a small camera’s picture may seem noisy, yet when shooting at ISO3200, a full-frame DSLR image can have almost no noise.
- You may get the required depth of field required by adjusting the aperture.
- To get good exposure, set ISO at its lowest level and adjust the shutter speed accordingly.
- Use a higher ISO and a quicker shutter speed to remove motion blur from the subject.
Make sure to use a wide aperture if the ISO is too high, and you still can do so, even if a part of the ideal depth of field in the process is missed.
The Best ISO for Various Situations
- ISO 100-200 🡪 Under a cloudless sky
- ISO 200 to 400🡪 Outdoors at dawn or dusk
- ISO 400-800🡪 High-intensity lighting
- ISO 800-1600🡪 Semi-darkened interior.
- ISO of 1600-6400🡪 Outside at night or in a poorly lit interior.
The shutter speed and aperture combination selected will also play a role in determining the ISO to utilize. This can be achieved by either opening up the aperture or boosting the ISO exposure while photographing fast-moving objects that need a 1/500th-second shutter speed.
A lens with a high maximum aperture, like f/1.8, can shoot at a lower ISO than a lens with a low aperture, like f/2.8. For landscape photography, accommodate the reduced depth of field by either slowing down the shutter speed or raising the ISO to utilize a lower aperture.
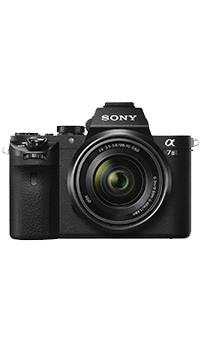
The Best Performance ISO camera
- Stabilizing the images is an excellent way to reduce blur.
- Improved grip.
- Improved battery life performance.
- Superior autofocus.
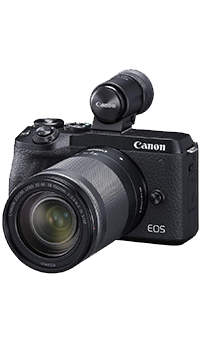
- Amazing hues.
- The Touch and Drag AF technology implemented by Canon is the greatest it’s ever been.
- Higher megapixels.
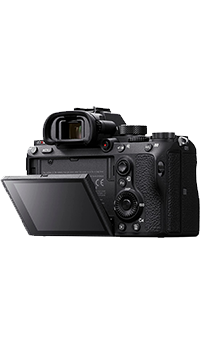
- This camera’s lower ISO settings provide excellent noise control, while you can find details up to ISO 25600. However, it’s advisable to avoid the higher ISO levels of 204800 and 409600.
- OSS (Optical Steady Shot) image stabilization may be used with E-mount and A-mount lenses to correct for three directions, two of which are adjusted by the lens.
- The 5-axis sensor stabilization mechanism will be employed for picture stabilization when using a standard lens without OSS.
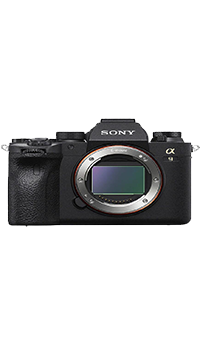
- Exmor RS Full-Frame BSI CMOS sensor with 24.2MP resolution.
- This camera has a mechanical shutter and an electronic shutter with an ISO range of 100-51,200 and 50-204,800.
- An in-camera 5-axis sensor-shift image stabilization.
Video Links to know about ISO camera
What is ISO? Photography Tutorial: ISO Made Easy
Camera Basics for Video: What is ISO?
How to Use Shutter Speed, Aperture, and ISO For Video
Learn Photography – ISO Tutorial!
What is the best ISO to use? Test your own camera ISO.
ISO Settings using Sony Alpha Cameras
Final Thoughts
Take the best possible picture every time. Even when your camera is at its prime, low-light photography remains a challenge. However, you can achieve a perfect shot with the complete guidelines that we have provided here for ISO cameras. Get more practice on images, and as a result, even in the most challenging conditions, your camera will give outstanding results.


